1-Day Tween Girl Makeover
- Caitie Fackler

- Mar 26, 2023
- 3 min read
Updated: Aug 16, 2023
SURPRISE! We are taking over our 10-year-old neighbor's bedroom and transforming it from rainbows and unicorns to a boho beach oasis!
All of our Amazon sources used in the room can be found here.
Her mom gave me a lot of freedom in the design of this room! We knew we wanted to add an accent wall and tween girl vibes instead of the girly kid feeling it currently had.

I am super excited about this style of board and batten. It is a mash-up of the styles I used in Reece and Ellie's room!
As far as paint color, we are using Rocky River by Sherwin Williams which is a nice blue-green that will contribute to the oasis vibes.
The walls are currently painted a light grey and we plan to keep them for now!
These sconces are battery-powered which is super nice as I won't have to hardwire anything!
Finally, I am SUPER pumped about this swing! I mean who doesn't want to have a comfy, cozy swing in their room?!
She already had a similar canopy bed to the one pictured!
First things first, we had to prep! Our special gal was only going to be gone on Saturday so I got to work preparing as much as possible on Friday night!
To plan out the board and batten, I used a construction calculator from inchcalculator.com. This eliminates ALL of the guess work (and the math). Just simply add your wall measurements and the width of the stiles (vertical pieces) that you will be using.

I then packed ALL the things! Luckily, this project was for a neighbor, so I used my kid's wagon and wheeled the tools down the street.
Tools:
Miter Saw
Drill
Impact Drill
Multi-Tool
Level
Caulk Gun
Hammer
Brad Nailer
Paint Roller
Materials:
1x3 MDF Boards
1x2 MDF Boards
Paint: Rocky River by SW
Paintable Caulk
Wood Filler
Paint Roller
Angled Brush
Baby Wipes

Here is the before! Now that my neighbor girl is basically grown, she was ready for a tween girl room!

Step 1: Remove the baseboard. This step may not be necessary depending on your baseboards. Then use the multi-tool to cut out a chunk of the baseboards perpendicular to your accent wall.

Step 2: Add Baseboard and Top Horizontal Pieces. I HIGHLY recommend using a laser level to ensure that your top horizontal is level. It doesn't matter your home's age, most likely your walls are not square. We then added the vertical pieces. Our vertical pieces were 65" tall.
Attach MDF boards using brad nails. DO NOT use liquid nails unless you hate your drywall. :)

Step 3: Add Horizontal Pieces. One of my favorite parts about board and batten is that is 100% customizable! I eyeballed the distance I wanted and then used my laser level to make sure everything lined up.
Step 4: Finishing Work. It will look a little scary, but this step is very important. Here is where the baby wipes come into play! Wood fill the nail holes and where the MDF meets. Then before it is completely dry, wipe away the excess wood filler so that you do not have to sand. Next, use paintable caulk to fill the seams where the MDF meets the wall. Smooth the caulk with, you guessed it, a baby wipe!

Step 5: Paint! Such a big difference!

Besides the accent wall, we added:
LED lights (a must-have for all teens)
Curtains
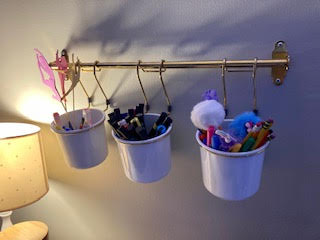
Storage Solutions
Gallery Wall
What do you think?! Her reaction was priceless! It made my whole day! And now I can't wait to redo her sisters' rooms!
.png)


Comments